
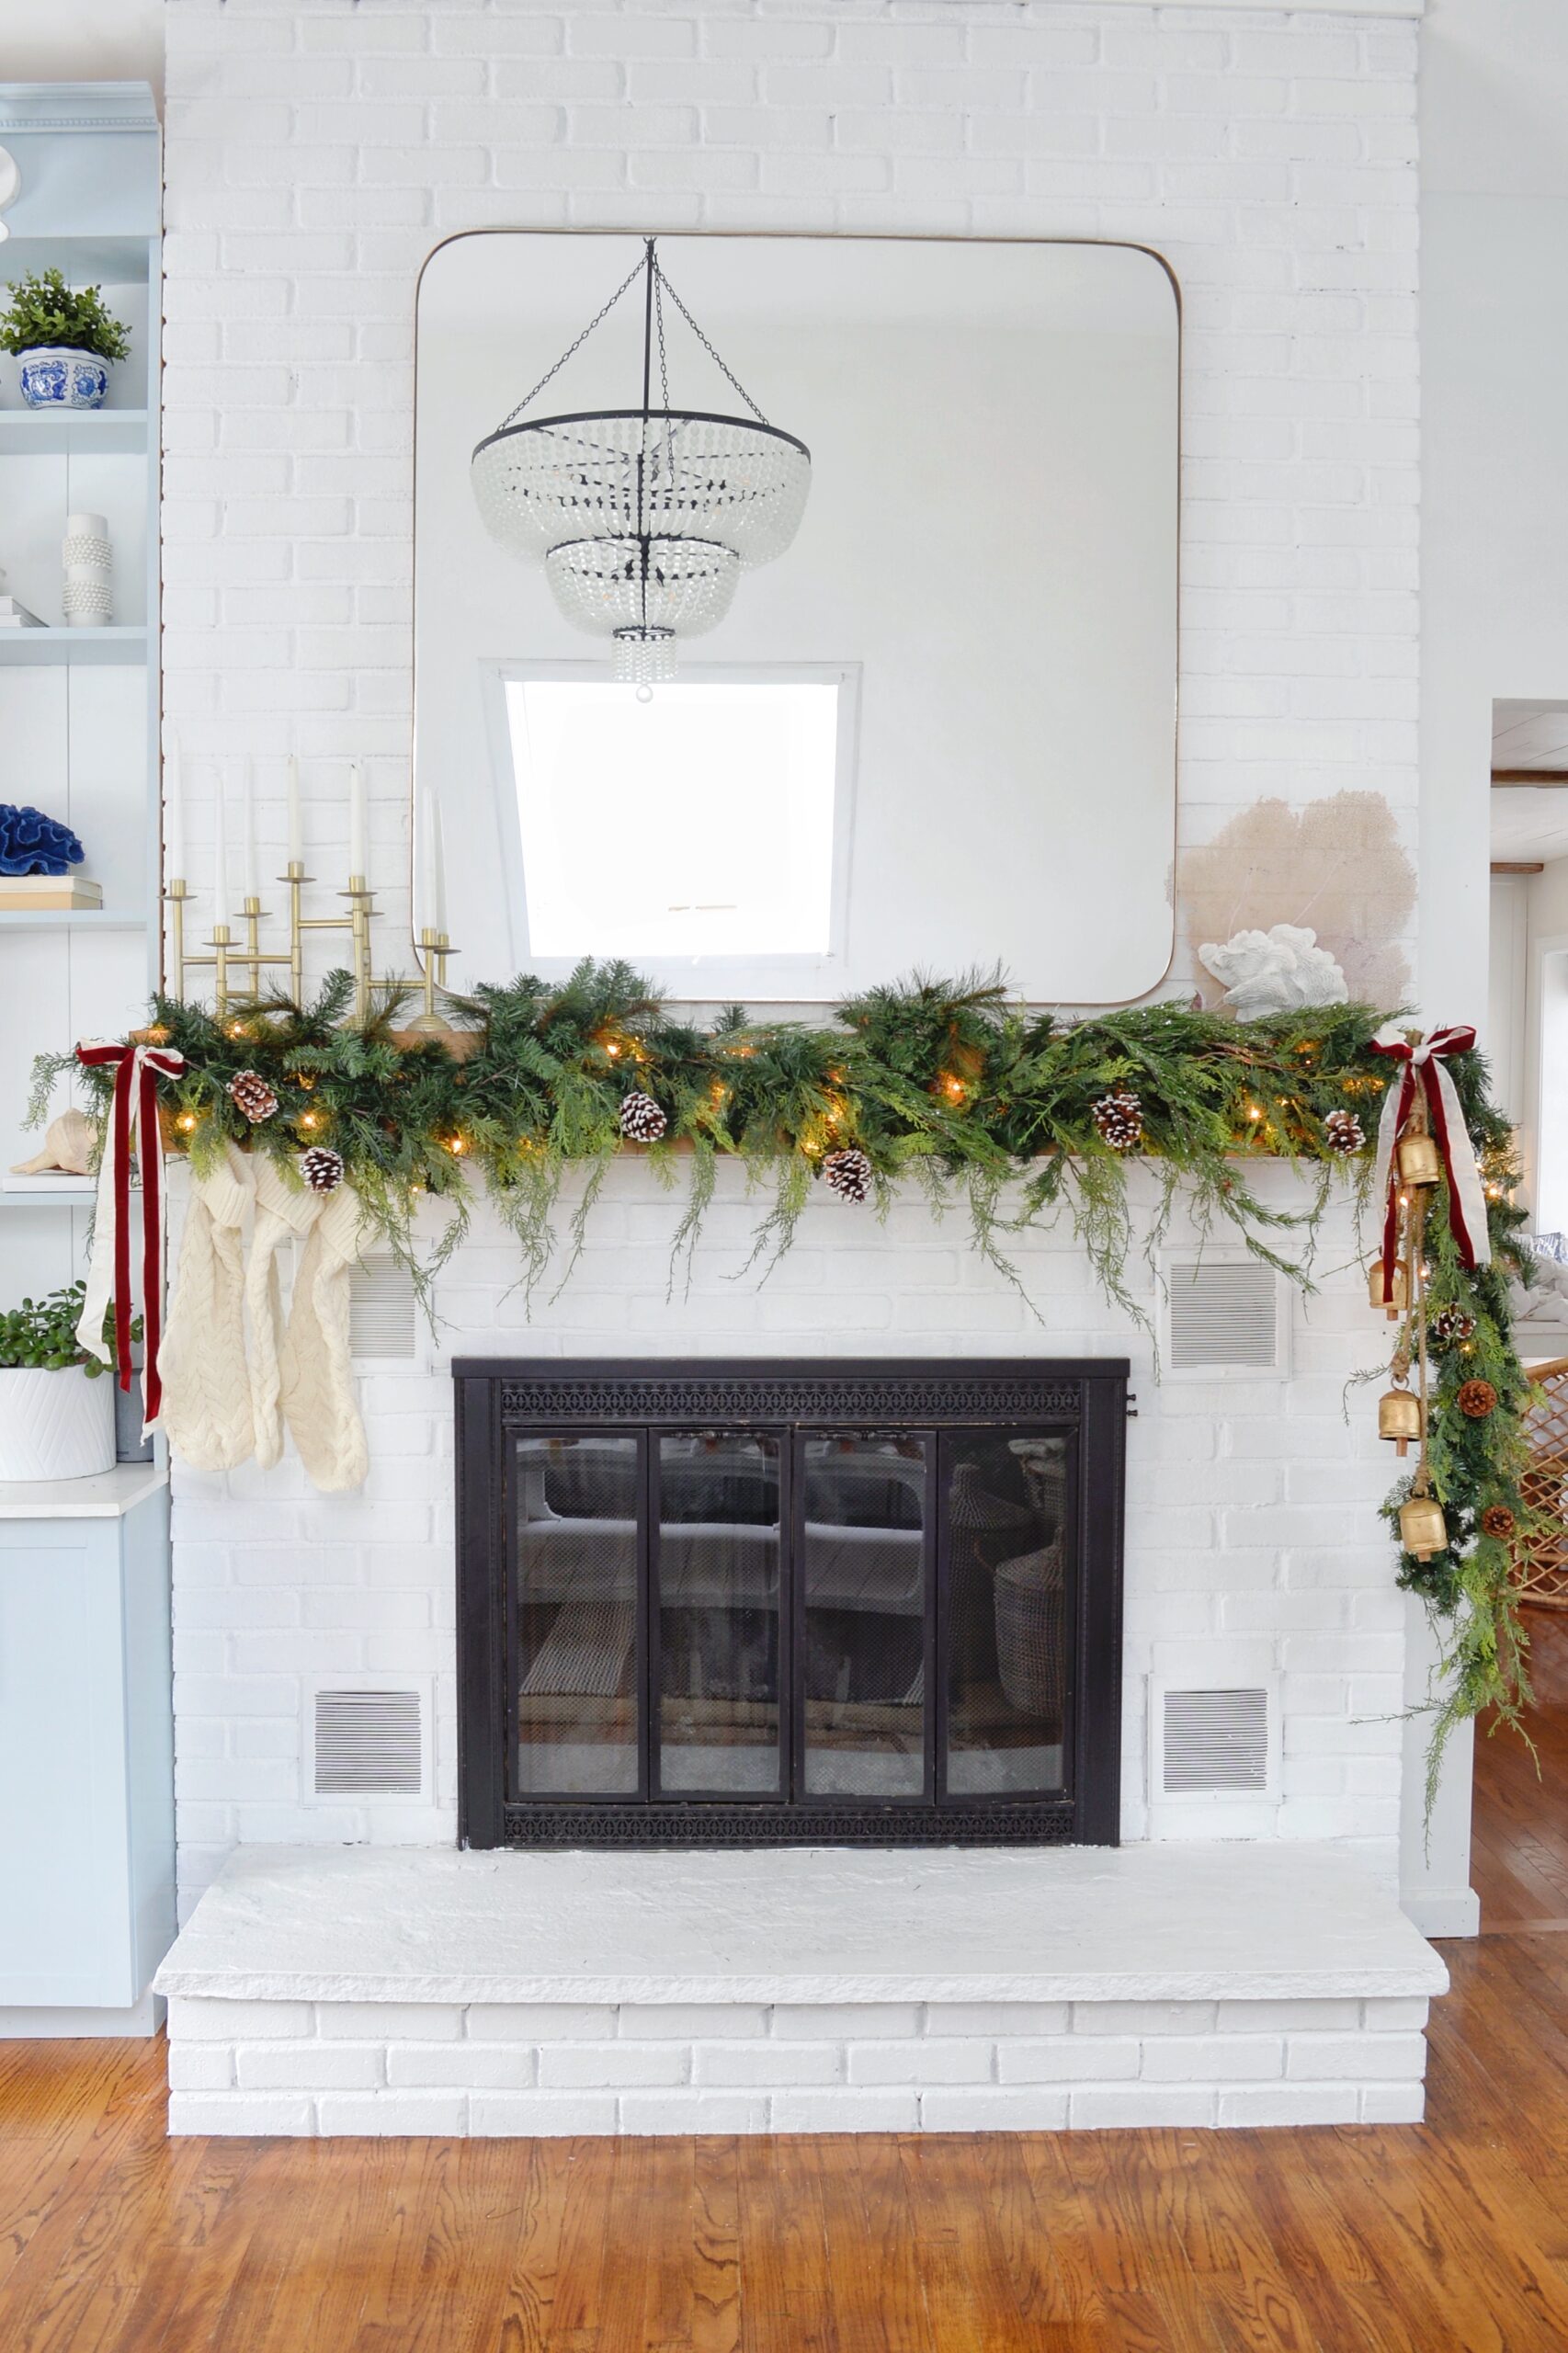
Getting the holiday garland just right is always one of my favorite things to tackle during the holiday season. I usually place one on the mantel and then one up our staircase banister. Over the years I have learned the tricks to achieving the high end designer look, of those lush full garlands, on a modest budget.
With the garland full, you really don’t need to add a ton of extra details, as the garland itself becomes such a statement. Here I will guide you to create one of your own!
To start, you will want to grab a few strands of the inexpensive garland (enough to cover your area), seen here. This particular one is sold at Walmart.
I have several of these inexpensive ones. I have found that getting the pre-lit is nice, as you remove the step of having the weave in the lights.
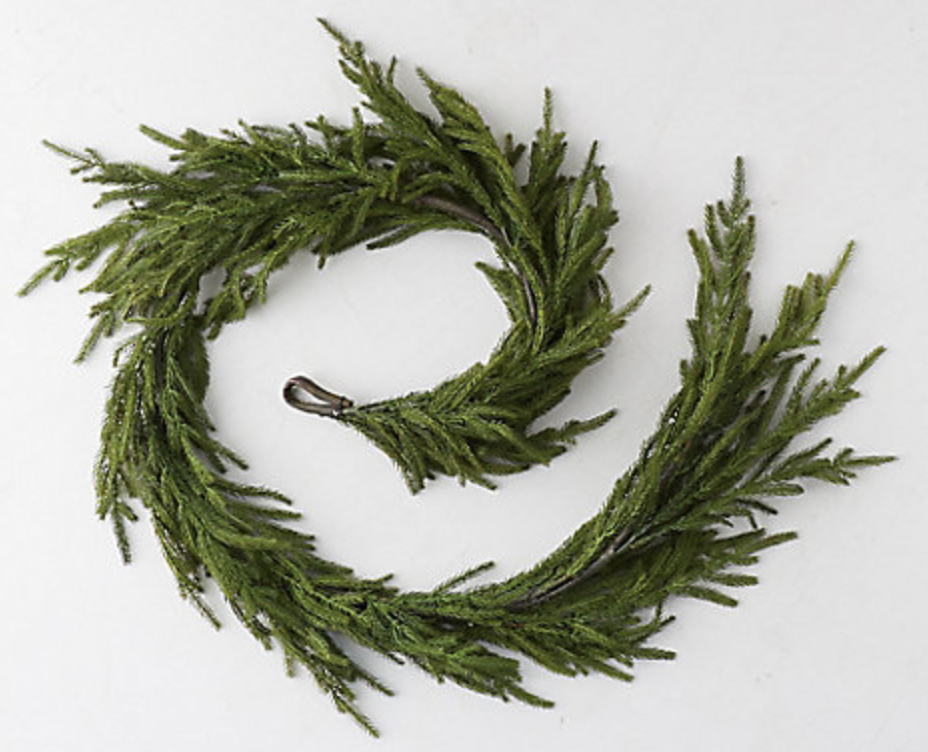
You will want to then find different types of strands of garland, I find that Hobby Lobby or Michaels has many different types. These you will use to weave into the faux one mentioned prior. This is the faux cedar garland that I have from Terrain, and its beautiful!
You can also find individual sprigs at these stores, as you can see below. These are great for adding dimension in different locations along the garland, after you have weaved together the different strands.

I found mine at Hobby Lobby, I also picked up some pine cones which add character along the garland.

The last details I usually add to my garland are bells, ribbon and of course stockings. Here are the ones I will be adding to mine.

Here are the bells that I have had for years and LOVE! The stockings were a great find on Amazon, they come in a 6 pack for $35! Lastly, the ribbon is something that I make sure to pick up now, because the closer we get to Thanksgiving the stock greatly diminishes and all the good ribbon is gone!
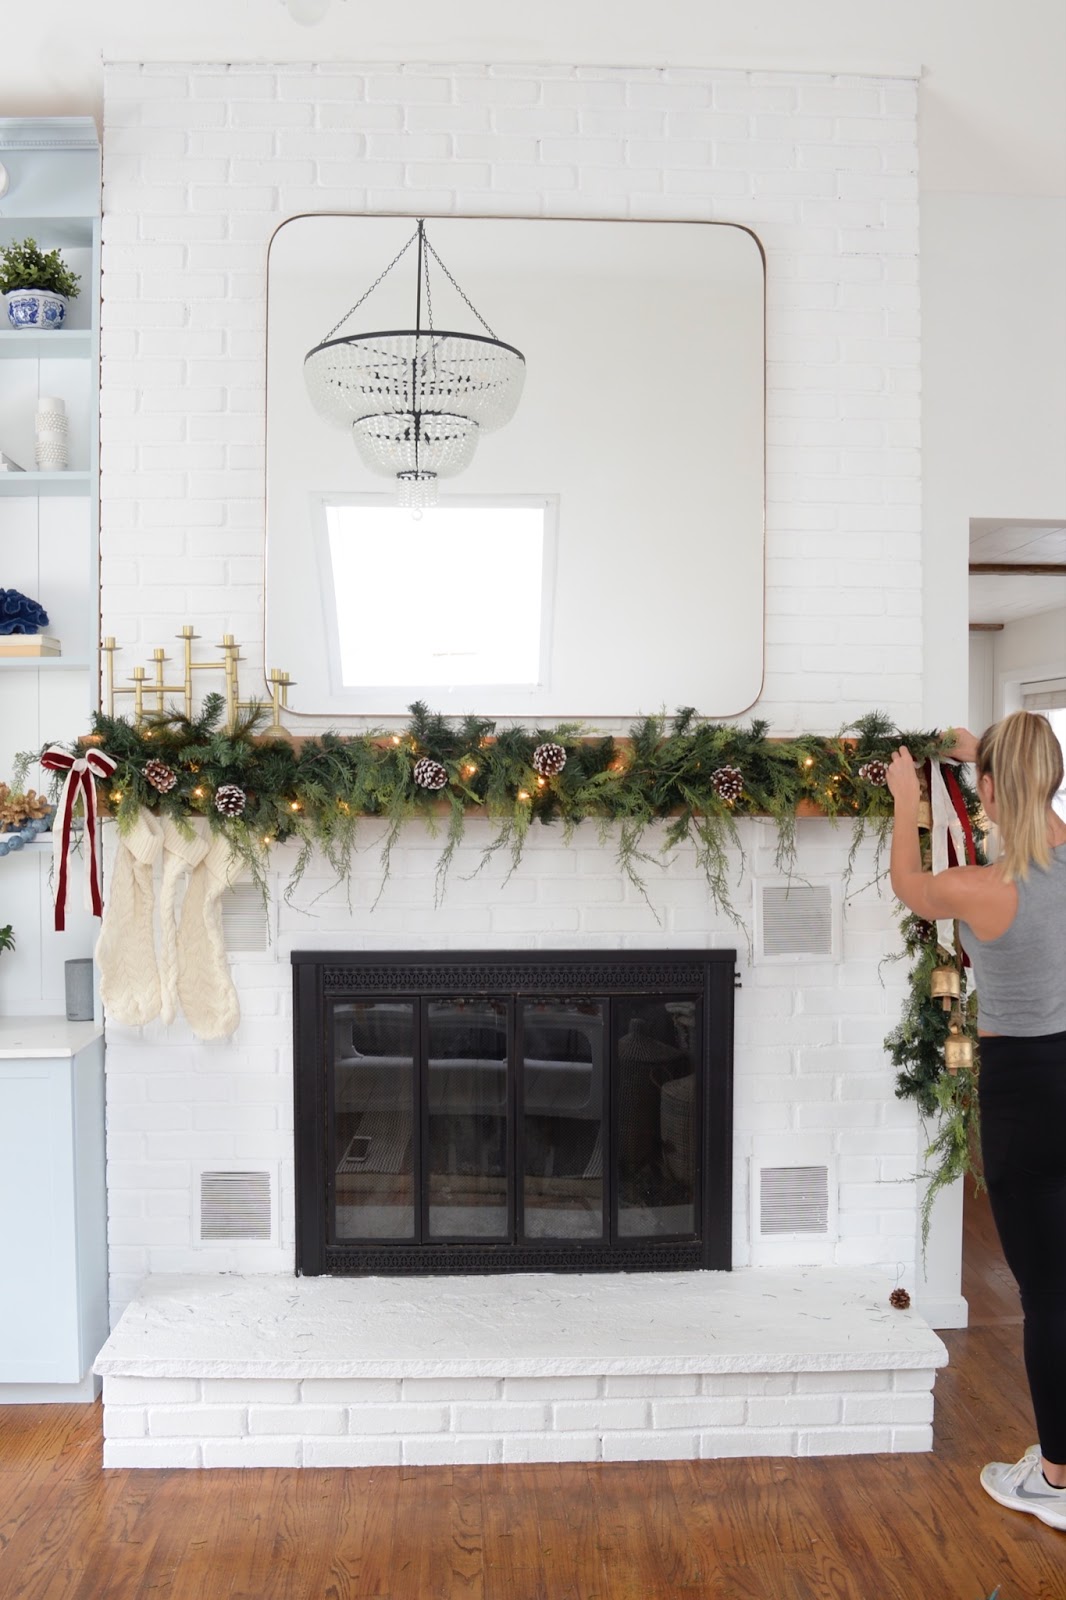
Now that you have all the pieces you need, you can get started. I usually place the faux pine garland from Walmart on the mantel first. I usually have one side cascading down, I just personally like this look.
Once this is up, I will work in the other garland (mine is a faux cedar garland). The varying types of greenery gives the garland dimension.


Once you are happy with how this looks, you can move onto the sprigs and the pine cones. I usually stick the sprigs in locations where I feel there is a gap or empty space. These can add additional dimension to the garland, without you having to weave more longer strands to the full length. You can also find sprigs that have other decorative accents, just to boost the overall look!
The pine cones I try to spread out naturally along the stretch of the garland. My pine cones have some white touches on the tip, and I twisted in some floral wire around the base, just to add some length and stability to each one. Some don’t need it, but the larger ones I will twist around some of the faux pine garland.


With the filler pieces added, you can add the final detail parts. For me that is the stockings, ribbon and the bells. These have always been my go to over the years, and each year I might switch up the ribbon color, but I love the bells, they are always a piece I use on my mantel garlands!
Once you are happy with the overall look of your final pieces you are done! It is truly that simple, there are so many possibilities, and with this as your base you can create so many different looks to go with the theme you are doing for the holiday season! And you can use the same technique when doing a stair banister!


Make sure you follow along on IG, as I will be taking you through the full how to through my stories! I’ll be sure to save it all to highlights too!
Save this for later on Pinterest, so you can re-create it every year!
1