
Hey there and HAPPY FRIDAY! Our kitchen got a boost in its style and character in the last few weeks and I want to take this post to detail how we went about! This is definitely a two person project, as you need hands to help hold certain parts into place while another nails in the boards.
Our original space looked like this, certainly something thats still pretty and has character, however I personally always wanted more of a custom look for over our large stove. When we originally renovated this kitchen a custom wood vent hood just wasn’t in out budget, and this one work and has been great ever, but I’m always looking to make changes!

So as with any project I went to the most trusted source I could, Pinterest. Duh! Hahaha. However, I was shocked to find little to no tutorials on how to really go about building a vent cover over an existing one, now they very well could be out there I just might not have searched well enough or long enough.
Since I couldn’t find anything I just scribbled on piece of paper the look I was trying to achieve, showed my husband and then we discussed how we’d go about building it without having to drill/nail into our backsplash. We could have easily screwed into the tile, and that’s certainly a way to go about this, however I just didn’t want to make those type of permanent choices for this DIY if we didn’t have to!
To start, we had to figure out what type of wood and the amount we would be needing. Our range is 48” wide, so we knew the base would be a little bigger as we had to account for the covering the edges of the hood. the List we came up with is below, the below list will have to be adjusted to suit the needs of your current hood.
LIST:
– (1) 4×8 sheet of sanded birch at 1/4“ thickness (this was used as the face and sides of the hood)
– (3) 1x3x8 pine boards used for the supports of the face and sides
– (3) 2x2x8 pine boards used for the top frame, side frame and front frame.
– (1) 8’ Crown moliding
– (3) 8’ Lattice moliding
– (1) 8’ Corner molding
Once we had our supplies, we measured the top of the hood to see where the studs were, once we found studs on either side of the chimney stack we secured a board into each, then one across the front. We added an extra onto the left side to accommodate the look we were trying to achieve.

From there we focused towards the bottom of the hood. We knew that the side frames of the hood would have to rest on top of the current hood, we found the 2x2x8 boards fit perfectly on the ledge of the old hood. We built two rectangles out that would sit on each of the the hood.
When building these frames, make sure to make the frames longer than the actual hood. So that you are able to still access the buttons that may be on the front. Ours has all the electronics on the front so we made ours extend 1.25” pass the front to make sure it was easy to see and access.
The side frames needed to have height to them so that the front panel could be applied, as well as the supports for the exterior side panels.

Since our hood was so close to our cabinets we were going to use the cabinets as a way to attach the side frame on both sides. However, since the cabinets have a step in after the front of the cabinet we had to fill the space with a shim, that way when we screwed the side frame into the cabinet it would sit flush and not be pulled in towards the cabinet.
Prior to screwing the side frame into the cabinet we took our 4×8 sheet of sanded birch and cut a piece that not only would cover the side frame, but that would hang past the bottom of the hood. We personally wanted it to hang about an inch past the bottom, to ensure the hood would be hidden.
Here is an image of the filler piece, which we had attached to the panel.

The same was done on the other side of the hood. From there we pushed each frame back against the tile backsplash and secured them in through the cabinet using 1 5/8” screws.


Once the side frames were attached to the cabinets, we used the same method of building the frame to build the one for the front of the hood. We nailed this frame into the side frames using our finish nailer.

Once the front was secured to the sides, we cut the panel for the front and attached it using our brad nailer.

From here we were able to start using the 1×3 boards to build the supports for the front and side panels. We did an angle cut on the top and bottom of these boards, and made sure that the boards did not go all the way to the top/bottom of the support frames. This was done so the panels would be able to sit flush.


Now that all the supports were in place we measured for the the side and front panels. We simply measured the top width and bottom width of each section, connecting each measurement to achieve the shape of each section.


Now that the panels were all secured to the under frames it was time to start adding the molding. We started by adding crown molding to the top.

We used corner molding to frame out the edges of the top portion, and then simple pine lattice molding to trim out the bottom portion.


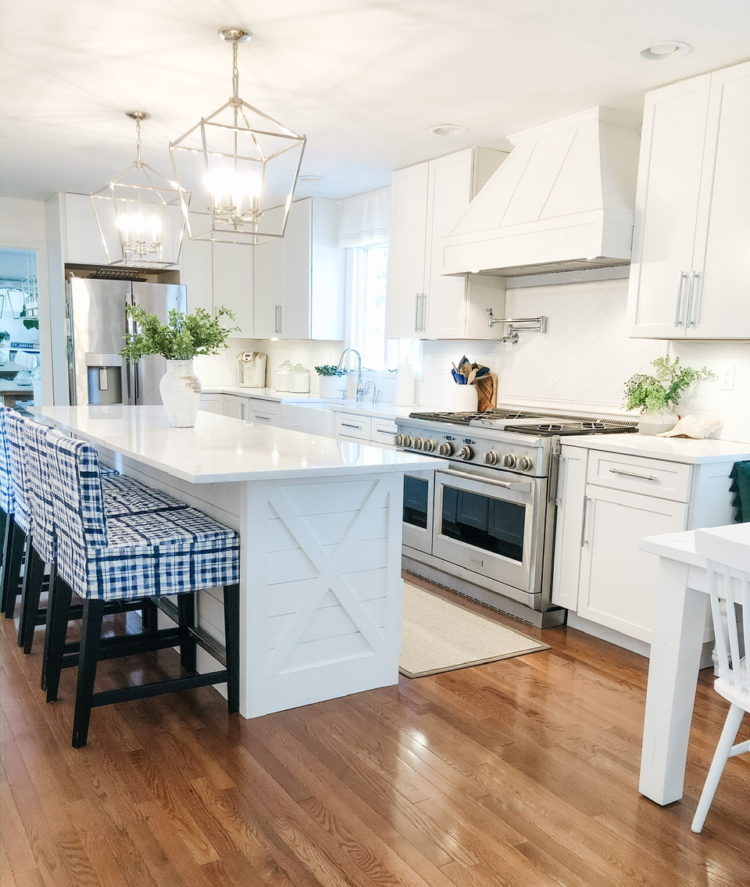
And here is a final image of the hood all trimmed out and ready to be either stained or painted.

We chose to paint our hood as it fit our space better, we also finally painted the ceiling in this area, we had always intended on doing ship lap on the ceiling, we still might! But for now we painted it 🙂

I really hope you found this tutorial helpful! If you have any questions feel free to leave them in the comments or shoot me a message!
29