
With the warmer months upon us here in CT, I knew I needed to get my butt on gear and start to get our 3 season porch in order. Compared to other rooms in our home, this one has definitely been left by the wayside, especially since we never use it when it’s cold out. Eventually I would like to heat it and make it a space we can always use, but that’s WAYYY down the line of projects around here.
So, for now I am just trying to give it some life so that it flows better with the rest of our home. To start, I knew I needed to tackle this dresser. For the longest time it was headed for the trash, however the other day I was sitting looking at it, and thought how much better it would look shorter and with one less drawer on top.

The beauty of this dresser is that the top drawer is alone on its one, with two decorative pieces surrounding it (one on the top and one under it). With the style being this way, converting it to a three drawer dresser was going to be easy.

To start, I needed to remove the top of the dresser. These older pieces are normally held together by a few screws and some nails. I started by removing the screws that held it into place, and then I used my pry bar to separate the nails from the base. I took my time as the top was already in rough shape, but it came off super easy.
Now with the top off I was able to better assess how I was going to convert this to a three drawer dresser. I realized all I had to do was measure down to the top of the next section and make a level mark all the way around the dresser. This would be my mark where I would follow to cut off the extra piece.


The circular saw is the best tool to use for this part, and doing it in sections was really important as I wanted to make sure I wasn’t cutting into the part of the dresser I was keeping.

Once I cut all three sides off I decided to trim about 4 inches off the legs, with it being only 3 drawers now, the legs also needed to be shortened so that it looked like it flowed together.
To cut the legs, all I did was mark the same distance up on each and used my circular saw again to cut the parts off, super easy!
To put the top back on, all I did was screw it to the frame, and then puttied the holes with simple wood filler. That way once it was painted you wouldn’t see them.
That was it! Now it was time for paint! I was so torn with the paint colors, I threw some swatches onto the dresser and narrowed it down to navy and my favorite hutch color. I took a poll on Instagram, and everyone was just as torn between those two as I was! My best friend gave me the extra nudge to go with my hutch color, as that color felt like home. She was right!

The question I get all the time when I paint furniture is what tools I use and of course what paint. I always, always use my ¼” Nap Roller whenever I can when I am painting furniture pieces, it always leaves the best finish and there are never any roller marks.
I also always use my favorite little shortcut brush. I like this one best because I feel I have the most control with it. My hands are not very large and this just fits well and is easy to get into the smaller grooves of some of these detailed pieces.
It is also very important to have good paint. For this project I used the Ben line from Benjamin Moore and it went on so smoothly and finished perfectly. I have also used Sherwin Williams Enamel paint in the past for other projects, and I have to say they both work similarly.
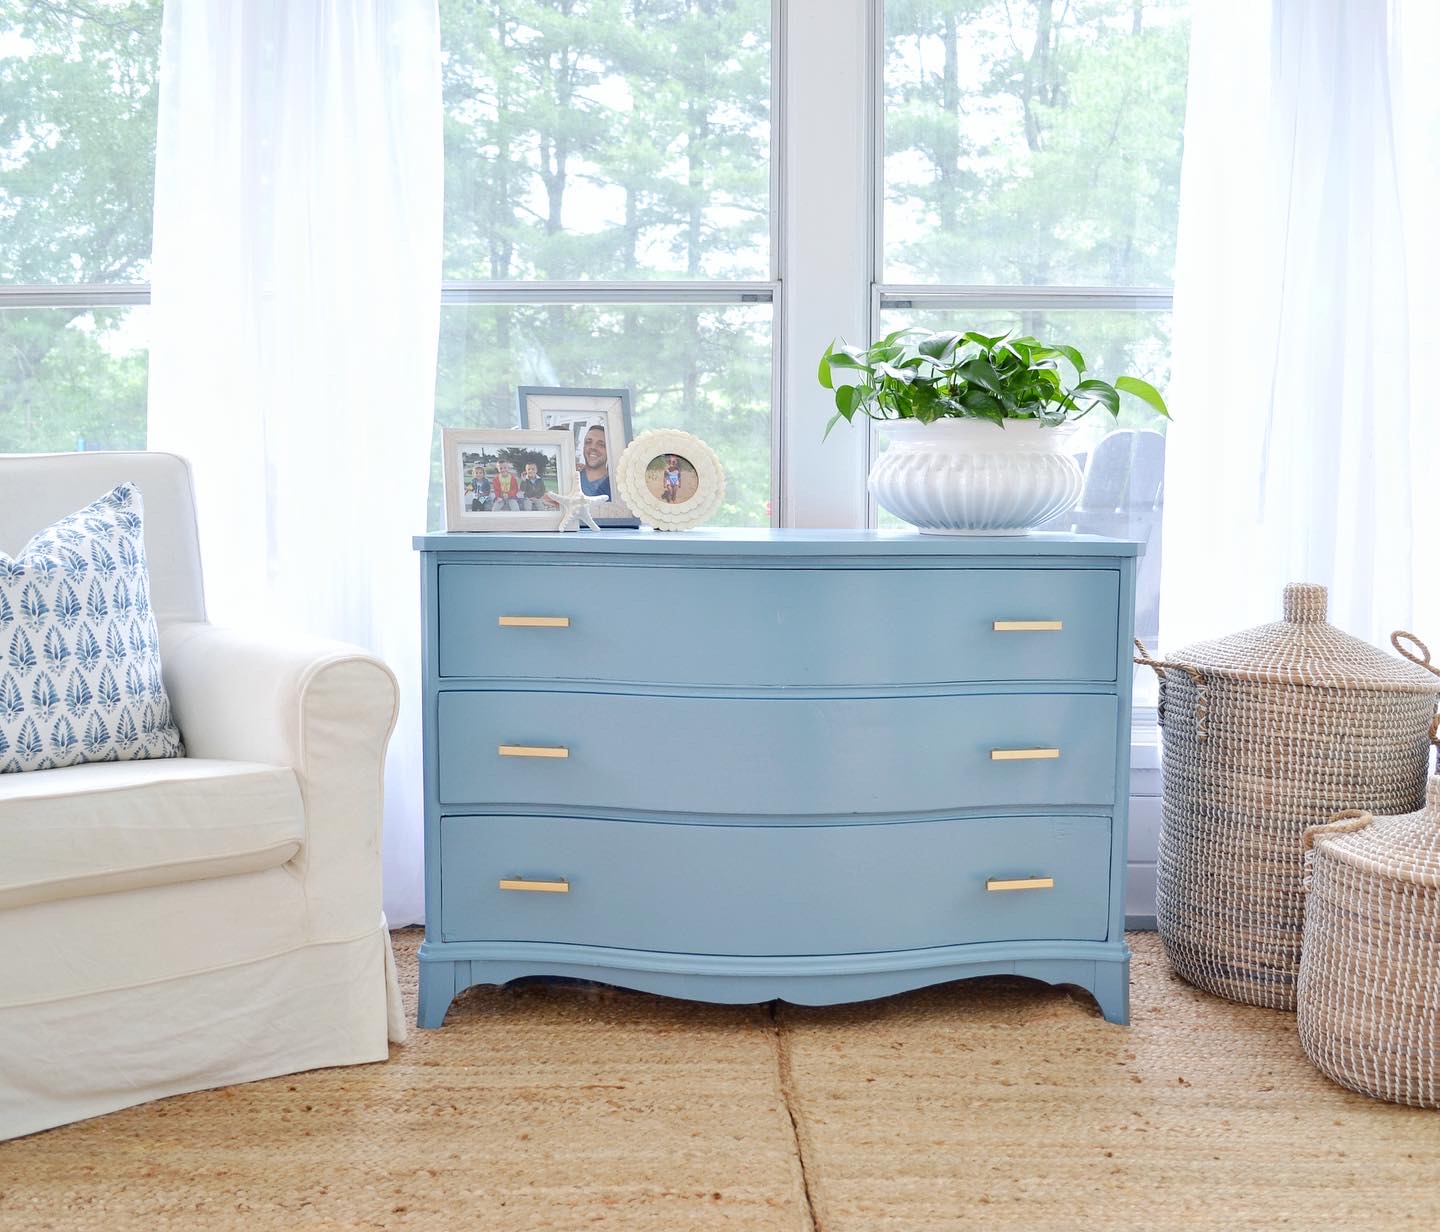
Overall, I am SO happy that I decided to keep this piece, and give it another chance at life. This will mainly hold beach towels, the pool pump and other summer items that we like to quickly access when we are hanging in the backyard! Plus it gave this space the pop of color it was needing!

Here is a close up of the blue color, it is seriously my absolute favorite color! I have it on my favorite hutch piece as well as the pantry doors in my kitchen! Just brings the right amount of that coastal vibe to any space!


Next up, I need to bring more decor into the room and get it feeling more like the rest of our home!
Stay tuned, because I will be sure to share the other parts of the room that I spruce up! Till then, let me know your thoughts below, and if you have any questions leave them here!
4
What is the paint color you ended up going with?
I just detailed it all here! https://schoolsidedesign.com/the-most-loved-blue-hutch-color/
I admire your talent, you are gifted. What is the color name you used for this? I live by the beach and would love to paint a few items on this color.
You are amazing, I admire you.
Thank you so much! I really appreciate it! I just detailed all about the color here! https://schoolsidedesign.com/the-most-loved-blue-hutch-color/
[…] when I was re-doing the dresser that lives now on my porch I was debating between Anchors Aweigh, which is a really deep navy, or […]