
This post does contain affiliate links.
I have been really itching to build lately, and with my boys growing bigger and bigger, I knew the perfect project for me was to build a new (bigger) coffee table for our family room!
I found this Studio Mcgee Coffee table and it reminded me so much of my round table, as it had similar corbels. From this picture alone I figured out a way to build it!

Here is a picture of the original table I had for this space, another one that I had built! The round is nice because it does break up all the straight angles and lines, however it just wasn’t conducive for our family anymore.

See on the weekends we typically eat our fun meals in here, and instead of having our family time around the kitchen table we get to sit around the coffee table and watch a movie together, my favorite parts of the weekend!
Okay, so lets get to what you’ll need if you are going build this table too!
To start, you need to figure out the size and shape you are looking for your table to be, for us I knew I wanted a 40″ square table, so that’s what this whole write up is based on.
I started by cutting the main boards, the 2×4’s and the 2×6’s. I knew that I wanted the legs of this table to sit on the floor, and not on the base of the table. Here is a close up of the inspiration table, I loved that they had the legs run straight to the floor.

Our old round coffee table sat at 18″ high, that worked great for us, so I knew I wanted the finish height to be the same. With that, I cut the 2×4’s at 17″ each, you will end up with a total of eight 17″ pieces of 2×4’s.
Next, I cut the 2×6 boards, which will make up the base of the table. I knew that I wanted the finished size to be 40″, and since I wanted the top of the table to have an over hang, I cut the base boards at 38.5″. You will end up with a total of 7 2×6 boards.
Now that these boards were cut, I decided to start by building the base of the table. I needed to join all the 2×6 boards together, this is where you’ll need the Kreg.
I place the boards on the floor all joined together, and made an arrow mark in the direction I wanted to create a pocket hole.
You can see here that I drew 3 arrows for the pocket holes on each side of the 2×6’s. That would mean there would be a total of 6 screws in each board to secure it in place. For me that was plenty.

Next, I drilled each of the pocket holes use the Kreg Jig, I set the jig to the appropriate setting for the size boards I had, they go by the thickness of the board, these are 1.5″.
In order to do this it is best to set these up on some saw horses, it makes it easier to drill each of the boards.
Once you have all the pocket holes drilled, you can then move onto attaching all the boards. I used 2.5″ screws to attach each board.
One thing that is extremely important when doing this step is using clamps. You need to be able to clamp the ends of the boards together like you see below, as well as a big enough clamp to pull the boards together to reduce the gap between each board as much as possible. This was the ONE thing I did not have for this project, my boards were fortunately tight together, and if I had an issue I had my husband come in a pull them tight.

I know that the end of the 2×6 boards is rough and not the prettiest, once the table is complete you will be adding a strip of veneer binding over this area to cover the rough edges. This is very important to note and remember for when you are making the notch for the legs later in this write up!
Now that the base was done and put together I needed to get the legs done. As mentioned above, the legs were all cut to 17″ long. Now I needed to make a bevel cut down the length of the board at a 45 degree angle. This way I could join the legs together to make a perfect corner. Like the inspiration table.

In order to achieve this look you’ll need a table saw with a blade that can tilt to a 45 degree angle. Once you have your saw set to 45 degree you just want to run each of the legs through to make the long bevel cut. Here you can see my running each through my saw.
Once these were all cut, this is how they should look when they are placed together.
To put these legs together I used finish nails as well as Gorilla Glue epoxy. You could use wood glue, liquid nails or the same epoxy. All I did was run a strip along the 45, and then place the two sides together, adding a few finish nails to hold it in place. This just gives the legs extra strength.
Now that all the legs were together, it was time to notch the base so that they would sit inside each of the four corners.
Here you can see that I made an outline of the legs, this is the area that you want to remove, so that they legs sit inside the table. This is where you will need to account for the veneer binding strip. You want the strip to run into the leg, so that it makes a smooth transition. So make sure when you are marking the legs, you account for the thickness of the veneer.

In order to cut the notch I used a jig saw, I found this was the easiest way to make straight clean lines. Here you can see one corner of the table cut out.

To attach the legs to the table, I used the 2.5″ screws again and put two in each side of the leg, that way they were very secure.

The next step I unfortunately didn’t capture a ton of pictures for, however its a fairly easy step.
Once all the legs are in place you’ll need to measure for the 2×2 boards. These boards will be place between each of the legs and act as a support for them. Each of mine measured 32″, I created a pocket hole adjusting my kreg jig accordingly for the size of my board. This way you can easily attach the boards to the legs.
Here is an image of the inside of the table, you can see the pocket hole I created and then attached to the leg.

Once the 2×2’s were all attached to the legs, I placed the 3/4″ plywood on top, making sure that the overhang around all four sides was equal, or as equal as you can make it.
I attached the plywood to the legs and 2×2’s using 1 5/8″ screws.
Now that the 3/4″ plywood was attached to the table, I could now place the birch veneer piece on top, I attached this to the table using the tube of liquid nails. This is the step where you will need a bunch of clamps as well has heavy objects to make sure the two pieces of wood adhere well together in the center as well as the sides.


Now the the top was done and secured, it was time to do the final step which was the corbels. These can be hard to cut, we used a 4.25″ hole saw to make the cut. However, if you do not have this you could always draw a circle and make the cut with a jig saw.
We used the left over ends of the 2×6’s that were used to make the base of the table. Just go slow when doing either method as you want the corbels to be as close to the same size as possible.
Once you are done cutting you should have a piece that looks like this.

We actually used our table saw to make make each of the 4 circles as close to the same size as possible. Here is a quick video showing the straight cuts and then ultimately cutting that circle into 4ths. Careful the sound is loud!
To attach the corbels to the table, I simply put them in their place and used the finish nailer to secure them in place.
The next step in the building process of the table is to add the 1.5″ wood strip around the top edge of the table. This will give the top a clean finished edge, instead of the raw edge of the plywood veneer piece.
All you will need to do is measure the length and make a 45 degree angle cut on the edges, so that each edge meets up neatly with the next.
The last step in the building process is to add the veneer binding strip to the edge of the 2×6 boards. All you will need here is your iron! That’s is! Here is a quick video of me applying part of the veneer. There was a section in my table that didn’t set right so I just re-did the one area.
Once you have all the wood done, then you will want to go over the table and use the wood putty to fill all the seams and cracks. This will give you a better finished look. Once the putty dries, make sure to sand it good and have all areas smooth to the touch.
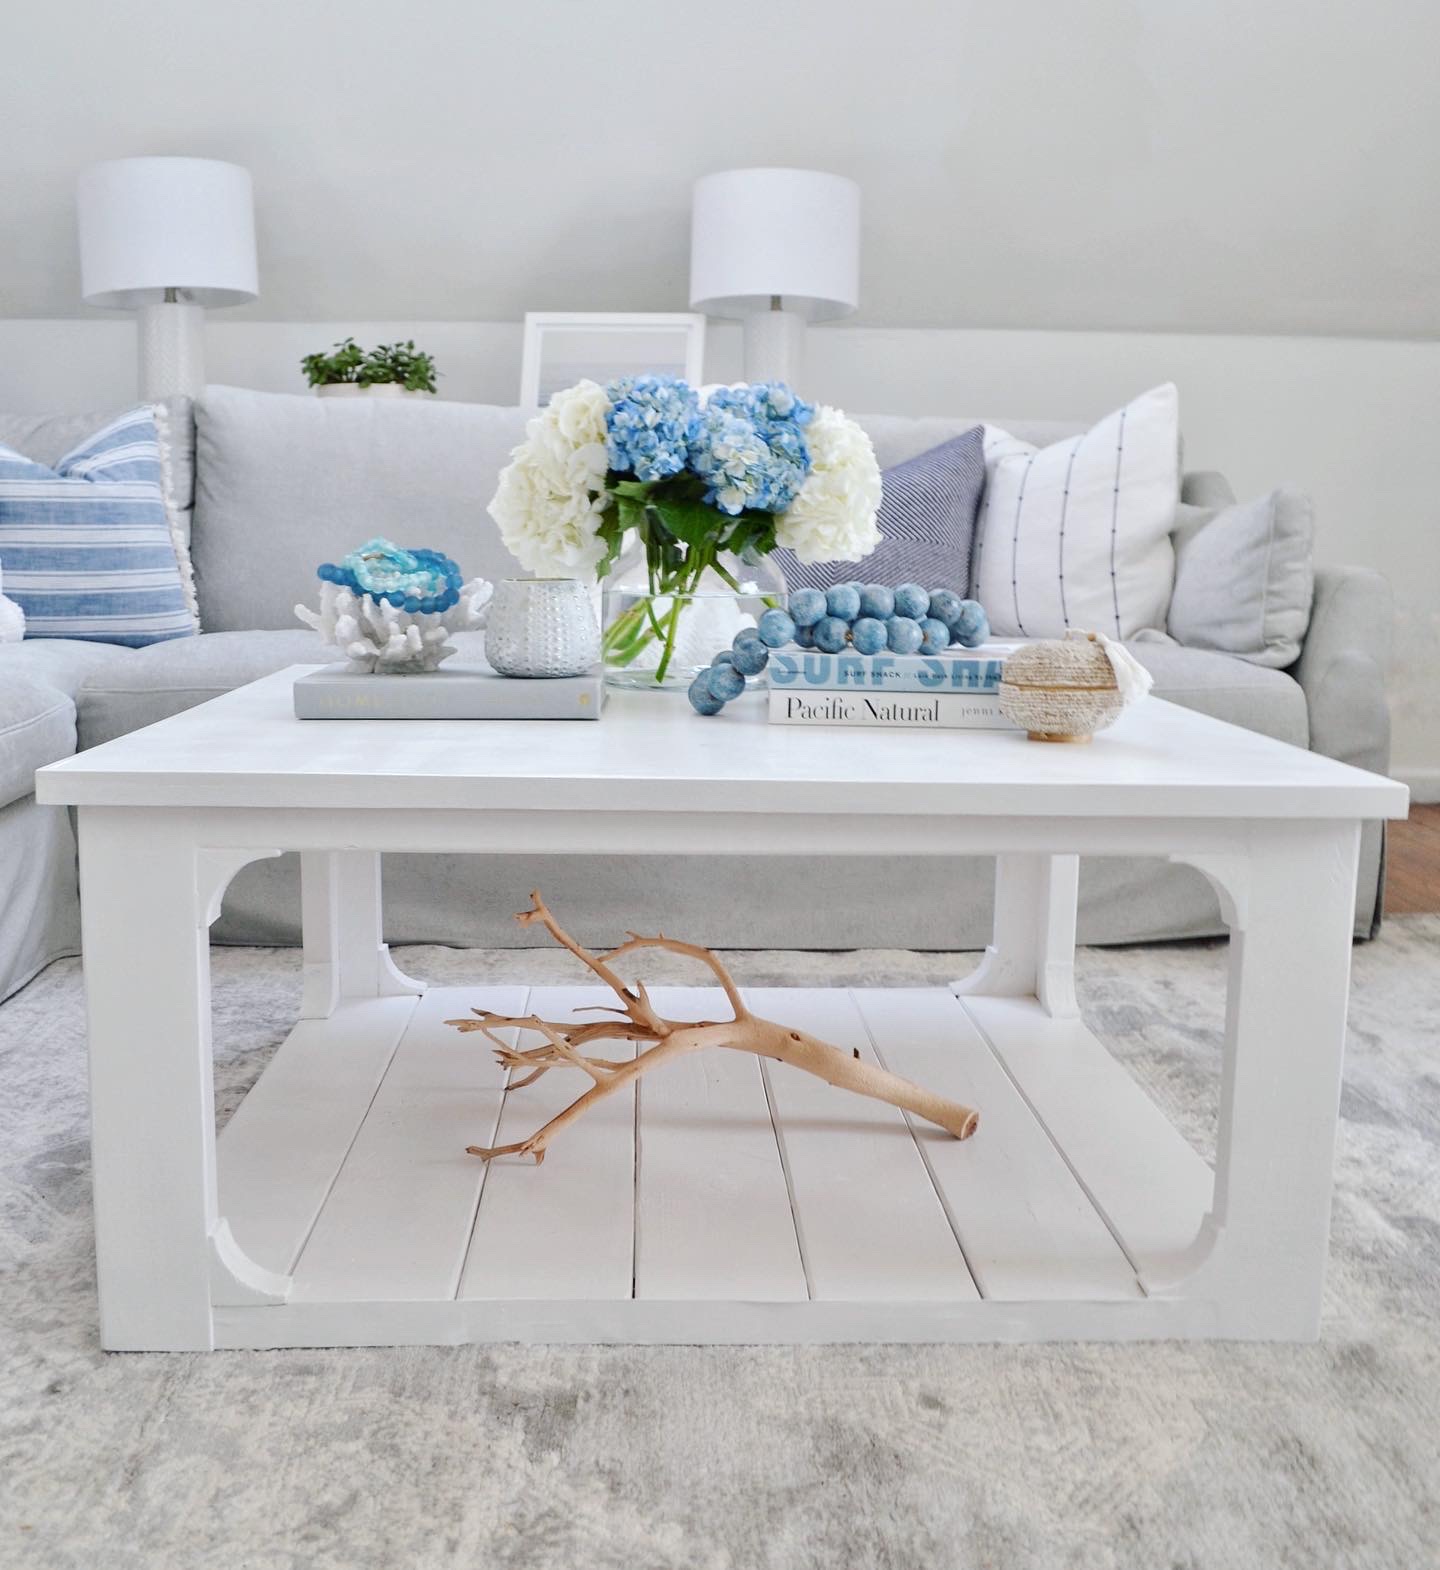
I chose to paint mine. I did one coat of Kilz and then did 2 coats of white semi gloss. I wanted the table to have a nice shine! And here it is all done!!


Then you are DONE! WOOHOOO, if you made it this far bravo! I am hoping you have the courage to tackle this yourself and create a table for your home!
As always follow me on Instagram for all new projects and if you want to see the highlight reel of this table being built, it is all on my page!
